Introduction
- Imageflow can be used as a library (libimageflow or imageflow-dotnet)
- Imageflow can be used as a command-line tool for scripting (imageflow_tool)
- Imageflow can be used as an HTTP server (Imageflow.Server)
All share support for the querystring API (RIAPI). libimageflow, imageflow-dotnet, and imageflow_tool currently support the JSON API.
The querystring API is much simpler, but the JSON API can compose multiple images or generate multiple image versions in a single job. You can also use the querystring API from within the JSON API.
Querystring API
Also called RIAPI (RESTful Image API)
This API doesn't care about the order in which you specify commands; they're executed in a standard order regardless.
trim whitespace -> srotate -> sflip -> crop -> scale -> filter -> pad -> rotate -> flip
Executing with imageflow_tool
imageflow_tool v1/querystring --in a.jpg --out b.jpg --command "w=100&h=100&mode=max" --quiet
URLs with demo server
http://localhost:39876/demo_images/tulip-leaf.jpg?w=300&h=300&mode=max
Common examples
width=100&height=100&mode=max&scale=downensures the image is downscaled to 100x100 or less, but does not upscale the image if it is already smaller than that. Aspect ratio is maintained.width=200&height=200&mode=max&scale=bothensures the image is downscaled or upscaled to fit within 200x200, maintaining aspect ratio.width=200&height=200&mode=pad&scale=bothensures the image is downscaled or upscaled to fit within 200x200, maintaining aspect ratio, then is padded to make the result always 200x200.width=300&height=300&mode=crop&scale=bothensures the image is downscaled or upscaled to fit around 300x300, then minimally cropped to meet the aspect ratio.scale=bothensures the image is upscaled if smaller so the result is always 300x300.
Image Transform Commands
widthconstrains the image width.wis an alias forwidthheightconstrains the image height.his an alias forheightdpris a multiplier forwidth/heightto make responsive image usage easier.modedetermines how to handle aspect ratio differences.stretchdistorts the image to be exactly the given dimensions, ifscale=both. Ifscale=down(the default), the image is only scaled ifwidthandheightare smaller than the image.padscales the image to fit withinwidthandheight, then pads 2 edges (bgcolor) to make it.cropscales the image to fit abovewidthandheight, then minimally crops to meet aspect ratio.maxscales the image to fit withinwidthandheight
scalecontrols whether images are upsampled or not.down- Never upscale an image - return at original size insteadboth- Downscale or upscale to meet size requirements. Image enlargement causes blurriness and should be avoided.canvas- Add padding instead of upscaling to meet size requirements.up- Never downscale, only upscale to meet requirements. Rarely used.
anchordetermines how the image is aligned when you usemode=crop,mode=padorscale=canvas. The default ismiddlecenter- values are
topleft,topcenter,topright,middleleft,middlecenter,middleright,bottomleft,bottomcenter, andbottomright.
- values are
sflipflips the source image in thex,y, orxydimensions.flipflips the result image in thex,y, orxydimensions.srotaterotates the source image90,180, or270degrees.rotaterotates the result image90,180, or270degrees.crop=x1,y1,x2,y2crops the source image to the given coordinates. If x2 or y2 are negative, they are relative to the bottom-right corner of the image.crop=10,10,-10,-10removes 10 pixels from the edge of the image.cropxunits=100&cropyunits=100makes thecropcoordinates percentages of the image instead of pixels.trim.threshold=80specifies a threshold to use for trimming whitespace.trim.percentpadding=0.5specifies percentage of padding to restore after trimming.bgcolormust be in the form RGB, RGBA, RRGGBBAA, RRGGBB, or be a named color.bgcolordetermines the color of padding added withmode=padorscale=canvas.ignoreicc=truecauses the source image's color profile to be ignored and treated as sRGB.ignore_icc_errors=truecauses color profile errors to be ignored rather than causing the operation to fail.
Image Filter Commands
f.sharpen=0..99determines how much sharpening to apply when scaling the image.f.sharpenwhen=always|downscaling|sizediffersdetermines when to sharpen.down.filterdetermines the down-sampling filter to use. Must be one ofrobidoux,robidoux_sharp,robidoux_fast,ginseng,ginseng_sharp,lanczos,lanczos_sharp,lanczos_2,lanczos_2_sharp,cubic,cubic_sharp,catmull_rom,mitchell,cubic_b_spline,hermite,jinc,triangle,linear,box,fastest,n_cubic,n_cubic_sharpup.filterdetermines the up-sampling filter to use. Seedown.filterdown.colorspace=srgbdownscales in the srgb color space instead of linear RGB. Mimics widespread but bad behavior; destroys image highlights.up.colorspace=srgbup-scales in the srgb color space instead of linear RGB.s.grayscale=true|y|ry|ntsc|bt709|flattransforms the image into grayscale using various methods.s.sepia=trueturns the image into sepia tones.invert=trueinverts the image colors in the srgb spaces.alpha=0..1makes the image partially transparents.contrast=-1..1adjusts the contrast in the srgb spaces.brightness=-1..1adjusts brightness in the srgb spaces.saturation=-1..1adjusts saturation in the srgb space
Image Encoding Commands
format=png|gif|jpeg|webpdetermines the format to encode the image as. Defaults to the original format.jpeg.quality=0..100determines the jpeg encoding quality. Default is90jpeg.progressive=trueenables progressive jpeg encoding.jpeg.turbo=trueencodes files faster at the expense of file size.webp.quality=0..100determines the webp encoding quality.webp.lossless=trueenables lossless webp encoding. Defaultfalsepng.lossless=falsedisables lossless PNG encoding. Defaulttrueunlesspng.qualityis specified.png.quality=0..100determines lossy png quality. Default100.png.min_quality=0..100determines the minimum png quality that must be realized before lossless is used. Default0
Querystring Examples
TODO
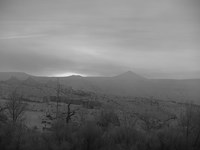
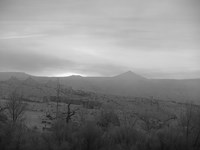
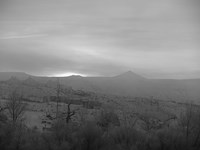
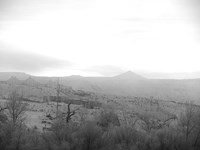
4 ways to grayscale
s.grayscale=true|y|ry|ntsc|bt709|flat (true, ntsc, and y produce identical results)
The following examples use NTSC/Y/True, RY, BT709, and Flat respectively
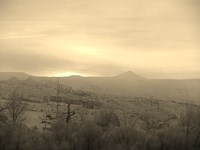
1 way to sepia
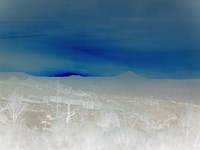
Inversion
Adjust opacity/alpha
s.alpha= 0..1
For true transparency, combine with format=png. Otherwise, the image will be blended against bgcolor.
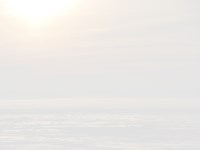
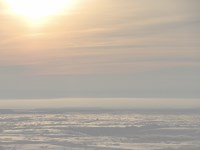
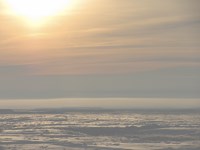
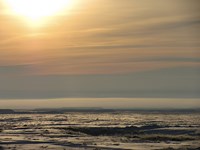
Adjust contrast
s.contrast= -1..1
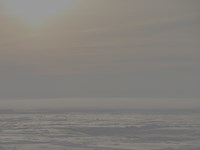
Adjust brightness
s.brightness= -1..1


Adjust saturation
s.saturation= -1..1


JSON API
JSON is primarily used by libimageflow and imageflow_tool.
You can specify a series of steps to take (the easiest), or you can specify a graph with
nodes and edges (which allows for multiple inputs and outputs). Note that you can watermark with a series of steps.
JSON jobs have the keys io and framewise, which refer to your inputs/outputs and steps/graph to apply to each image frame.
JSON jobs also have a security key that you can read more about here.
If you're using imageflow_tool v1/build, you'll need to specify your inputs and outputs. This isn't needed if you're using libimageflow and v1/execute, as you'll have already registered the inputs and outputs.
The following example uses steps to constrain an image to 1400px or less and encodes it in 8-bit png.
{
  "io": [
    {
      "io_id": 0,
      "direction": "in",
      "io": "placeholder"
    },
    {
      "io_id": 1,
      "direction": "out",
      "io": "placeholder"
    }
  ],
  "security": {
    "max_decode_size": {
      "w": 10000,
      "h": 10000,
      "megapixels": 100
    },
    "max_frame_size": null,
    "max_encode_size": null
  },
  "framewise": {
    "steps": [
      {
        "decode": {
          "io_id": 0
        }
      },
      {
        "constrain": {
          "mode": "within",
          "w": 1400
        }
      },
      {
        "encode": {
          "io_id": 1,
          "preset": {
            "pngquant": {
              "quality": 80
            }
          }
        }
      }
    ]
  }
}
Security
If you're getting things like source images, command strings or width/height values from untrusted sources, it's important to place limits on image sizes to prevent denial-of-service attacks.
JSON jobs have a security key that can be filled out like this:
Note that max_frame_size also limits the maximum decode and encode size,
so you don't have to specify max_decode_size and max_encode_size unless they are smaller.
If you don't specify a default, a max_frame_size of 10,000x10,000 and 100 megapixels will be set for you.
{
"security": {
    "max_decode_size": {
        "w": 10000,
        "h": 10000,
        "megapixels": 50
    },
    "max_frame_size": {
        "w": 10000,
        "h": 10000,
        "megapixels": 100
    },
    "max_encode_size":  {
        "w": 8000,
        "h": 8000,
        "megapixels": 20
    }
}
}
Decode Command
Typically, you only need to specify the io_id of the file you're decoding.
{
    "decode": {
        "io_id": 0
    }
}
However, some decoders accept commands that can be used to speed up the process.
The following causes the JPEG decoder to spatially downscale - in linear light - while decoding.
The image may not be scaled to the exact size requested, but it will be closer.
{
    "decode": {
      "io_id": 0,
      "commands": [
        {
          "jpeg_downscale_hints": {
            "width": 1600,
            "height": 1600,
            "scale_luma_spatially": true,
            "gamma_correct_for_srgb_during_spatial_luma_scaling": true
          }
        }
      ]
    }
}
You can also do this for WebP images, although there is no support for linear light scaling:
{
    "decode": {
      "io_id": 0,
      "commands": [
        {
          "webp_decoder_hints": {
            "width": 1600,
            "height": 1600
          }
        }
      ]
    }
}
You can force the color profile to be ignored.
{
    "decode": {
      "io_id": 0,
      "commands": [
        "discard_color_profile"
      ]
    }
}
Or just ignore color profile errors.
{
    "decode": {
      "io_id": 0,
      "commands": [
        "ignore_color_profile_errors"
      ]
    }
}
Encode Command
When encoding, you'll need the io_id of the file you're encoding to, and a encoding preset.
{
    "encode": {
        "io_id": 1,
        "preset": "gif"
    }
}
Jpeg (MozJpeg encoder)
quality: 0..100controls the image quality. Consider 80 as a good starting point.progressive: trueenables progressive jpeg encoding, which takes more CPU time.
{
    "mozjpeg": {
      "quality": 90,
      "progressive": false
    }
}
Gif
"gif"
Lossless PNG
{
  "lodepng": {
    "maximum_deflate": false
  }
}
Lossy PNG
quality: 0..100specifies the target quality to aim for.minimum_quality: 0.100specifies the actual quality below which to switch to lossless PNG.speed: 1..10controls the speed/quality tradeoff for encoding.maximum_deflate: truegains 1-2% in file size reduction at the expense of a tenfold increase in CPU time.
{
    "pngquant": {
      "quality": 90,
      "minimum_quality": 20,
      "speed": null,
      "maximum_deflate": null
    }
}
WebP (Lossy)
quality: 0..100determines the encoding quality. 80 is a good starting point.
{
"webplossy": {
  "quality": 80
}
}
WebP (Lossless)
"webplossless"
Deprecated Presets
{
  "libjpegturbo": {
    "quality": 90,
    "progressive": false,
    "optimize_huffman_coding": true
  }
}
{
    "libpng": {
      "depth": "png_24",
      "matte": {
        "srgb": {
          "hex": "9922FF"
        }
      },
      "zlib_compression": 7
    }
}
Constrain
wThe width constraint in pixelshThe height constraint in pixelsmodeA constraint modegravitydetermines how the image is anchored when cropped or padded.{x: 0, y: 0}represents top-left,{x: 50, y: 50}represents center,{x:100, y:100}represents bottom-right. Default:centerhintsSee resampling hintscanvas_colorSee Color. The color of padding added to the image.
{
  "constrain": {
    "mode": "within",
    "w": 800,
    "h": 600,
    "hints": {
      "sharpen_percent": 7
    },
    "gravity": { "percentage":  { "x":  50, "y":  50}},
    "canvas_color": "transparent"
  }
}
Constraint Modes
distortDistort the image to exactly the given dimensions. If only one dimension is specified, behaves likefit.withinEnsure the result fits within the provided dimensions. No upscaling.fitFit the image within the dimensions, upscaling if neededlarger_thanEnsure the image is larger than the given dimensionswithin_cropCrop to desired aspect ratio if image is larger than requested, then downscale. Ignores smaller images. If only one dimension is specified, behaves likewithin.fit_cropCrop to desired aspect ratio, then downscale or upscale to fit. If only one dimension is specified, behaves likefit.aspect_cropCrop to desired aspect ratio, no upscaling or downscaling. If only one dimension is specified, behaves like Fit.within_padPad to desired aspect ratio if image is larger than requested, then downscale. Ignores smaller images. If only one dimension is specified, behaves likewithinfit_padPad to desired aspect ratio, then downscale or upscale to fit If only one dimension is specified, behaves likefit.
Region Command
Region is like a crop command, but you can specify coordinates outside of the image and thereby add padding. It's like a window.
You can specify a region as a percentage of the image's width and height:
{
    "region_percent": {
        "x1": -1.0,
        "y1": -1.0,
        "x2": 101.0,
        "y2": 101.0,
        "background_color": "transparent"
    }
}
Or you can specify a pixel region
{
    "region": {
        "x1": -1,
        "y1": -1,
        "x2": 800,
        "y2": 800,
        "background_color": "transparent"
    }
}
Crop Whitespace Command
threshold: 1..255determines how much noise/edges to tolerate before cropping is finalized.80is a good starting point.percent_paddingdetermines how much of the image to restore after cropping to provide some padding.0.5(half a percent) is a good starting point.
{
  "crop_whitespace": {
    "threshold": 80,
    "percent_padding" : 2
  }
}
Rotation and flipping
The following nodes are simply strings rather than objects
[
  "flip_h",
  "flip_v",
  "transpose",
  "rotate_90",
  "rotate_180",
  "rotate_270"
]
Fill Rectangle Command
This draws a black 8x8 square at the top-left of the image.
{
    "fill_rect": {
        "x1": 0,
        "y1": 0,
        "x2": 8,
        "y2": 8,
        "color": "black"
    }
}
Expand Canvas Command
The following adds a 10px pink border around the image.
{
    "expand_canvas": {
        "left": 10,
        "top": 10,
        "right": 10,
        "bottom": 10,
        "color": {
            "srgb": {
              "hex": "FFEECCFF"
            }
        }
    }
}
Watermark
io_id(required) specifies which input image to use as a watermark.gravitydetermines how the image is placed within thefit_box.{x: 0, y: 0}represents top-left,{x: 50, y: 50}represents center,{x:100, y:100}represents bottom-right. Default:centerfit_modeis one ofdistort,within,fit,within_crop, orfit_crop. Meanings are the same as for constraint modes. Default:withinfit_boxcan be eitherimage_percentage(a box represented by percentages of target image width/height) orimage_margins(a box represented by pixels from the edge of the image). Defaultimage_margins0min_canvas_widthsets a minimum canvas width below which the watermark will be hidden.min_canvas_heightsets a minimum canvas height below which the watermark will be hidden.opacity(0..1) How opaque to draw the image. Default 1.0hintsSee resampling hints
Example with fit_box: image_percentage
This will align the watermark to 10% from the bottom and right edges of the image, scaling the watermark down if it takes more than 80% of the image space, drawing it at 80% opacity and applying 15% sharpening. It will not display on images smaller than 50x50px in either dimension.
{
  "watermark": {
    "io_id": 1,
    "gravity": {
      "percentage" : {
        "x": 100,
        "y": 100
      }
    },
    "fit_mode": "within",
    "fit_box": {
      "image_percentage": {
        "x1": 10,
        "y1": 10,
        "x2": 90,
        "y2": 90
      }
    },
    "min_canvas_width": 50,
    "min_canvas_height": 50,
    "opacity": 0.8,
    "hints": {
      "sharpen_percent": 15
    }
  }
}
Example with fit_box: image_margins
This will stretch/distort the watermark to fill the image except for a 5px margin.
{
  "watermark": {
    "io_id": 1,
    "gravity": { "center": null },
    "fit_mode": "distort",
    "fit_box": {
      "image_margins": {
        "left": 5,
        "top": 5,
        "right": 5,
        "bottom": 5
      }
    }
  }
}
Command String Command
It's possible to execute a querystring command within a JSON file.
This is commonly used by libimageflow bindings to execute querystring commands.
When specifying a decode io_id, no decode node is needed.
When specifying an encode io_id, no encode node is needed.
When specifying both, no other nodes are needed in the job. This is the preferred method of use, as decode hints will be optimized and encoder commands will be honored.
{
  "command_string": {
    "kind": "ir4",
    "value": "width=100&height=100&mode=max",
    "decode": 0,
    "encode": 1
  }
}
White Balance sRGB Command
This command is not recommended as it operates in the sRGB space and does not produce perfect results.
{
    "white_balance_histogram_area_threshold_srgb": {
       "threshold": 30
    }
}
Color Filter sRGB
This command is not ideal as it operates in the sRGB space. For alpha operations it doesn't matter, and for grayscale conversion it matches various international standards.
{
  "color_filter_srgb": "grayscale_ntsc"
}
{
  "color_filter_srgb": "grayscale_flat"
}
{
  "color_filter_srgb": "grayscale_bt709"
}
{
  "color_filter_srgb": "grayscale_ry"
}
{
  "color_filter_srgb": "sepia"
}
{
  "color_filter_srgb": "invert"
}
alpha: 0..1
{
  "color_filter_srgb": {"alpha":  0.5}
}
contrast: -1..1
{
  "color_filter_srgb": {"contrast":  0.5}
}
brightness: -1..1
{
  "color_filter_srgb": {"brightness":  0.5}
}
saturation: -1...1
{
  "color_filter_srgb": {"saturation":  0.5}
}
Resampling Hints
Resampling hints can be specified in constraint commands, scale commands, watermarking, and for compositing. They offer control over image sharpness, resampling color space, background color, and more.
sharpen_percent(0..100) The amount of sharpening to apply during resamplingup_filterThe resampling filter to use if upscaling in one or more directionsdown_filterThe resampling filter to use if downscaling in both directions.scaling_colorspaceUselinearfor the best results, orsrgbto mimick poorly-written software.srgbcan destroy image highlights.background_colorThe background color to apply.resample_whenOne ofsize_differs,size_differs_or_sharpening_requested, oralways.sharpen_whenOne ofdownscaling,upscaling,size_differs, oralways
{
  "sharpen_percent": 15,
  "down_filter":  "robidoux",
  "up_filter": "ginseng",
  "scaling_colorspace": "linear",
  "background_color": "transparent",
  "resample_when": "size_differs_or_sharpening_requested",
  "sharpen_when": "downscaling"
}
Resampling Filters
robidoux- The default and recommended downsampling filterrobidoux_sharp- A sharper version of the aboverobidoux_fast- A faster, less accurate version of robidouxginseng- The default and suggested upsampling filterginseng_sharplanczoslanczos_sharplanczos_2lanczos_2_sharpcubiccubic_sharpcatmull_rommitchellcubic_b_splinehermitejinctrianglelinearboxfastestn_cubicn_cubic_sharp
Colors
Colors can be named, or be RRGGBBAA hexadecimals.
transparentblack{ "srgb": { "hex" : "ffffff" } }
Using a JSON Graph
The following generates 4 sizes of images in a single job. Much execution time is saved because the image is not re-decoded for each output.
Still, it is best to use a fluent API to help build JSON graphs, as it can be error prone.
{
  "io": [
    {
      "io_id": 0,
      "direction": "in",
      "io": "placeholder"
    },
    {
      "io_id": 1,
      "direction": "out",
      "io": "placeholder"
    },
    {
      "io_id": 2,
      "direction": "out",
      "io": "placeholder"
    },
    {
      "io_id": 3,
      "direction": "out",
      "io": "placeholder"
    },
    {
      "io_id": 4,
      "direction": "out",
      "io": "placeholder"
    }
  ],
  "framewise": {
    "graph": {
      "nodes": {
        "0": {
          "decode": {
            "io_id": 0
          }
        },
        "1": {
          "constrain": {
            "mode": "within",
            "w": 1600
          }
        },
        "2": {
          "constrain": {
            "mode": "within",
            "w": 1200
          }
        },
        "3": {
          "constrain": {
            "mode": "within",
            "w": 800
          }
        },
        "4": {
          "constrain": {
            "mode": "within",
            "w": 400
          }
        },
        "5": {
          "encode": {
            "io_id": 1,
            "preset": {
              "mozjpeg": {
                "quality": 90
              }
            }
          }
        },
        "6": {
          "encode": {
            "io_id": 2,
            "preset": {
              "mozjpeg": {
                "quality": 90
              }
            }
          }
        },
        "7": {
          "encode": {
            "io_id": 3,
            "preset": {
              "mozjpeg": {
                "quality": 90
              }
            }
          }
        }
        "8": {
          "encode": {
            "io_id": 4,
            "preset": {
              "mozjpeg": {
                "quality": 90
              }
            }
          }
        },
      },
      "edges": [
        {
          "from": 4,
          "to": 8,
          "kind": "input"
        },
        {
          "from": 2,
          "to": 4,
          "kind": "input"
        },
        {
          "from": 1,
          "to": 2,
          "kind": "input"
        },
        {
          "from": 0,
          "to": 1,
          "kind": "input"
        },
        {
          "from": 3,
          "to": 7,
          "kind": "input"
        },
        {
          "from": 1,
          "to": 3,
          "kind": "input"
        },
        {
          "from": 2,
          "to": 6,
          "kind": "input"
        },
        {
          "from": 1,
          "to": 5,
          "kind": "input"
        }
      ]
    }
  }
}
Create Canvas Command.
The following node creates a 200x200 transparent canvas.
{
  "create_canvas": {
    "format": "bgra_32",
    "w": 200,
    "h": 200,
    "color": "transparent"
  }
}
The following node creates a 200x200 black canvas. Transparency operations will not work as the canvas doesn't support an alpha channel.
{
  "create_canvas": {
    "format": "bgr_32",
    "w": 200,
    "h": 200,
    "color": "black"
  }
}
Copy Rectangle Command
This node can only be used with graph, as it requires both a canvas and an input node.
The following node copies (but does not blend/composite) a 100x100 square from the input node to x:100, y:100 on the canvas node.
{
  "copy_rect_to_canvas": {
    "from_x": 0,
    "from_y": 0,
    "w": 100,
    "h": 100,
    "x": 100,
    "y": 100
  }
}
Draw Image Exact Command
The following node will compose the input image with the top-left 100x100 square on the
canvas, distorting it if the aspect ratio is different. 15% sharpening will be applied.
This node can only be used with graph.
{
  "draw_image_exact": {
    "x": 0,
    "y": 0,
    "w": 100,
    "h": 100,
    "blend": "compose",
    "hints": {
      "sharpen_percent": 15
    }
  }
}